Tuesday, March 27, 2007

Texas Pecan Cake


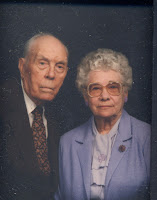
Wednesday is my Grandmother Cleo’s birthday- she would have been 95. I’m sad to say, I never made her a birthday cake while she was alive.

Both of my parents are only children, and for much of my life, my grandparents all lived in the same small town, roughly an hour and a half from Kansas City. When my grandparents were younger, they drove to KC to celebrate the holidays with us, but as we all became older, we went more often to celebrate down there. Because my birthday falls on or about the American holiday that prominently features turkey, too many of my birthday dinners also featured turkey. And pumpkin pie for dessert. I don’t remember when Cleo started making this cake for me each year, but I am willing to bet it was prompted by my complaints about the pumpkin pie.

I adore this cake. It is actually a fruit cake, but don’t let that deter you- it has NOTHING in common with the much maligned fruitcakes served at Christmas. Because it is a fruitcake, there is no icing- one of the reasons I love it so much. I don’t have much of a sweet tooth, and this cake is exactly sweet enough for me. After Cleo died, I missed it for several years. Last year, my sister J (Baker Extraordinaire) took pity on me, and made one for my 50th birthday. This year past birthday, my husband and daughter-in-laws came through for me. I love my family!

It’s a heavy cake; a little goes a long way. It does freeze well, and if it dries out too much to be good to eat plain, makes a wonderful addition to bread pudding. I always thought this was an old, secret family recipe, but apparently my grandmother cut it out of a women’s magazine. The golden raisins are important in this cake- dark ones just won’t do. But I have often thought that it would be pretty tasty with cranberries instead…

Texas Pecan Cake
1 lb Unsalted butter
2 cups Granulated sugar
6 Eggs, well beaten
1 tsp Lemon extract
4 cups Unbleached flour
1 1/2 tsp Baking powder
4 cups Pecan halves
2 cups golden raisins
The recipe yield is: 10 Servings

Preheat the oven to 300F.
Grease and lightly flour a 9 3/4 in tube pan. Shake out any excess flour from the pan.

With a mixer or by hand, blend the butter and sugar together in a large bowl; beat until the mixture is light and fluffy.

Gradually add the eggs and lemon extract, and beat well. Sift the flour and baking powder together three times; add the nuts and raisins.

Gradually add the dry ingredients to the creamed mixture and blend well.

Pour the batter into the tube pan. Bake 1 1/2 to 2 hours, or until a cake tester comes out clean. Cool the cake for 15 minutes, then remove it from the pan. Serve it dusted with powdered sugar, if desired

Mary, over at Alpineberries has a recipe for a Red Velvet Cake that reminds me of Cleo, as well. I don't remember that she made them frequently, but she did make them. I didn't care for them- I was convinced, I think, that there were beets in there, and that turned me off. Now, however, I find them quite acceptable!

This ends my month of grandmotherly food. I had been thinking that I needed a theme for this food blog, but nothing was coming to mind. After struggling to meet the Grandma theme this month, I now know not to tie myself down to any theme. It was tough restricting myself, and there were lots of yummy dinners I wasn’t able to put up here because I was trying to stay with the Grandma deal. So- no more monthly themes for me! I’m free! (Gosh, who would have thought I would have trouble being restricted!)

Monday, March 26, 2007

2 for 1 Moroccan carrot appetizer and Lentil and Carrot Soup


I started out this month by saying that there was a trio of March birthdays in my family. My sister Amanda is the third member of that trio, and her birthday is tomorrow.

Amanda is an amazing woman, and I'm not saying that just because she's my sister. She loves to travel and to be out in nature. I am in awe of her because she does such a wonderful job of living her life according to her convictions; something that seems like it would be easy to do but isn't always.

I thought the recipe mirrored many of the things Amanda holds important. Vegetarian, low fat, and reflective of world cultures, I think she would really like it. I'm sorry we don't live close enough for me to run a bowl over to her, but next time I visit her, I'll make it for her.

About a month ago, my husband Chuck and our friends Pat and Zip ate at a Moroccan restaurant near Harrisburg. Zip had a cold cooked carrot appetizer that I thought was very one of the best things we had that night. Chuck wouldn't try it, because he doesn't like cooked carrots. Neither do I, but this was tasty.

This past week I was looking through a copy of Crescent Dragonwagon's Passionate Vegetarian, and found a recipe called Morroc' n' roll oven roasted carrot dip on page 14.

As always, since I just can't seem to follow a recipe without making changes, I noted the changes I made to this one.


Morocc’n’roll oven roasted carrot dip
Passionate Vegetarian

oil or cooking spray
1 pound (6 medium) carrots, unpeeled, stem end left on
1 large red onion, unpeeled, quartered
1 head garlic, cut in half crosswise (I should have used 2 heads)
2 T olive oil
1 T tamari or shoyu soy sauce
2 t ground cumin (I used about 2 Tablespoons)
2 t paprika (I left this out because I didn't have any
Pinch cayenne (I used about 1 t Korean ground red pepper)
1-4 T vegetable stock, water, carrot juice or olive oil (I made a cup of mint tea with 2 teabags and used that instead)
Salt and freshly ground black pepper to taste

1 Preheat oven to 375.

2 Oil or spray a baking dish large enough to accommodate the vegetables in one layer.

3 Bring a large pot of water to boil. Drop carrots into boiling water and blanch for 4-6 minutes depending on size

4 Place carrots in prepared baking dish, along with onion and garlic. Toss vegetables with 1T olive oil, rubbing oil into vegetables a bit. Drizzle with tamari and toss. Arrange cut-side down.


5 Bake until carrots are soft- can pierce with a fork and quite brown hereand there, especially on the edge that has touched the dish. This will take about 40 minutes, longer if carrots are plump. Let cool.


6 Cut stem ends from the carrots, remove paper skin from onions. Place in a food processor. Squeeze the garlic cloves out of their skin directly into the food processor, discarding any that are either still hard or deep brown. Add cumin, paprika, and cayenne, along with remaining T of oil, and pulse. (I scraped the baking dish out with a rubber scraper and used that in the food processor- it was not crusty and baked on, just a little brown-ness and some oil and tamari.)

The mixture will be dry and chunky. Add stock (or other liquid) a T at a time. Pulse until smooth, then season to taste with tamari, salt and pepper. (Be careful here- I overloaded the food processor and got big hunks surrounded by paste. I should have done a few carrots at a time, but I got impatient. Next time I will process most of the carrots, and then hand chop to a small dice about 1/3 or them, so I have small chunks.)

Let spread mellow overnight or up to 3 days in refrigerator. Take it out 1 hour before serving to let it reach room temperature.

I tried this on crustini, and it was very good- the flavors blended together, but each added it's own individual note. The mint flavor was very subtle. I thought it needed more garlic, but perhaps then the garlic flavor would have drowned the others. I reserved about 1/4 of the recipe, and used the rest for the lentil soup.


To make the soup-

Lentils- I used a 1 pound bag of green lentils, and about 1 cup red lentils
2 quarts vegetable stock

Cook the lentils in the stock until they are soft but not mushy. Add the carrot mixture. Let mellow in the refrigerator over night. Serve with a dollop of yogurt

Monday, March 19, 2007

Yummy Fried Pies


I love breakfast- it's perhaps my favorite meal. I love eggs over easy and bacon, biscuits and gravy, pancakes, muffins, Eggs Benedict. I even love oatmeal.

When we stayed over at Cleo's, her breakfasts were always a treat. We didn't often have eggs, because she had a cholesterol problem and avoided them. But we didn't miss them, because the other things she made were so delicious. Two of my favorites were Rice and Raisins, and Fried Pies.

I'm not going to give a recipe for Rice and Raisins, because it's just like it sounds- basically boiled white rice with golden raisins, served like oatmeal with butter, sugar and milk. The trick with this is to plump the raisins in hot water before adding them to the rice. I have to say, I have tried this with brown rice, and it just isn't the same. I guess it's the layer of memories that makes this the only time I prefer white rice to brown!

Fried Pies, though, are another story. Filled with dried apricots, cooked and mashed, these things were so marvelous just thinking about them makes my mouth water even now. When Cleo died, we didn't find a recipe for them amongst her things, and she hadn't made them for years. My sister and I discussed how we could reproduce them, based on some pretty old memories.

Enter the Internet- I did a search on Fried Pies, and came up with several recipes. None seemed quite right to me- I was convinced that Cleo made a yeast raised dough for these. But none of the recipes were yeast raised, and most of them had an apricot filling, so I thought perhaps my memory was faulty.

I found this recipe on Texas Cooking Online, and made some changes.

Grandma's Fried Fruit Pies
Makes 12 fried pies

3 cups all purpose flour (I used 1 & 1/2 cup white, 1 & 1/2 cup white whole wheat)
1 teaspoon salt
3/4 cup Crisco or other good vegetable shortening (I used butter)
1 egg, lightly beaten (I used 2 eggs)
1/4 cup cold water (I used 1/2 cup cold water)
1 teaspoon white vinegar.

Mix the flour and salt together, cut in the shortening until the mixture looks like large crumbs. Mix the eggs and water together, sprinkle over the flour mixture, Sprinkle in the vinegar. Mix lightly, until ingredients are well combined. (At this point, I thought my dough was too dry, so I added the additional egg and water)

Form the dough into a ball, wrap in plastic wrap , refrigerate for at least an hour.

Filling-
3 cups dried fruit; apricots, peaches, apples (I used some commercial apricots, some apricots I dried myself, and some commercial dried raspberries)
1 & 1/2 cups water
6 Tablespoons sugar (I used 1/4 cup apricot flavored honey)
1/4 teaspoon cinnamon (left this out)
1/4 teaspoon ground allspice (left this out)

On low heat, simmer the dried fruit in the water for 30-45 minutes, or until very tender. Add more water if necessary to prevent scorching. Allow to cool, mash fruit slightly, stir in sugar and spices. (I put the fruit, water, and honey in my large Pyrex measuring cup, set the microwave at 40% and cooked for 20 minutes, checking after 10 minutes to see if it was soft enough.)

Divide the pastry into 4 equal pieces, then cut each of these into 3 equal pieces. You should have 12 golf ball sized dough balls. (I was only able to get 8 dough balls, larger than a gold ball- I am not very good with dough.) On a lightly floured surface, roll each ball into a 5-6 inch circle.

Put 2 generous tablespoons of filling onto one side of the dough circle. Fold over and seal the edges. The picture shows 2 sealed pies, one pie with filling and one dough circle.

Deep fry 3-4 minutes, or pan fry in about 1/2 inch oil, turning as needed. Sprinkle the hot fried pies with confectioners sugar or cinnamon sugar. (I didn't do that)

The pies were OK. The dough was much as I remembered it, which surprised me since it had no leavening in it what so ever. The filling was tasty. Given my inexpertise with dough and frying, I think they turned out pretty good. I think my sister, who is a better pastry chef than I, would have done a better job with them. I had much too much filling left over, but I didn't measure the fruit very accurately. I can always find a use for cooked dried apricots! My husband ate them warmed over the next day, and felt there was too much whole wheat, but other than that they were good. Again, I think if I were better with pastry and had been able to get the dough thinner, he wouldn't have had a problem with the whole wheat. By the way, the picture of the finished pies, at the top, are shown on a small plate- they aren't as big as they look!

Wednesday, March 14, 2007

Party Foods ala Cleo

One of the family jokes around my house when I was growing up was that my Grandmother Cleo had no sense of humor. She couldn't tell a joke to save her life, and if you told her one, she picked it to pieces. But despite her lack of humor, she loved a party. And she loved the new, "fun" convenience foods of the '60's and '70s. It was at her house that I first tasted Pringles and Bugles.

When I was very young, Cleo had a job that required her to travel a lot. She sent packages of exotic food to us every so often. (What I remember most clearly were the tins of smoked oysters. I loved them so much that I literally made myself sick on them one time, and can no longer face them.) When one of those boxes arrived, we would have what we called "funny suppers"- an evening of snacking on whatever was in the box.

Later, when her job changed and she settled in the same town with us, Cleo used to babysit us quite a bit. On the weekends, we usually stayed overnight. There were a lot of us, all girls, and as she lived in a 1 bedroom apartment for some of the time, our stays had a slumber party ambiance. Cleo played to that ambiance- lot's of girly stuff. There were bottles of witch hazel to put on cotton pads to make your eyes less puffy, interestingly scented bath ingredients for luxurious bubble baths, and of course, party fare. If we requested some special food, she would go out and purchase it, but these three favorites showed up every time.

Turkey Pastrami roll-ups: (I still love this to this day!)

Take some deli-sliced turkey pastrami, spread cream cheese on one side of the slice, roll it up.

Apricot mocktails

Dilute Apricot nectar half and half with Seven-up or ginger ale. Drop in a maraschino cherry, or a little grenadine syrup. Serve over ice.

(Actually, I still use a version of this, on the rare occasions when I really want a sweet carbonated beverage, I will dilute fruit juice with seltzer water)

Bean Dip with Capers

Add some sour cream to a can of Frito-Lay bean dip, along with half a jar of drained capers. Eat with Fritos, preferably the big, wide ones..
(And we're three for three- I will eat this when I am deep in a comfort food seeking funk! It's just as good with a can of refried beans, some chili powder and a few more capers. But the Fritos are an integral part!)

By the way, Cleo was the only grandmother I knew who drove a 1968 red fastback Barracuda Fastback. It looked just like this one and I looked Way Cool tooling around town in that thing once I was old enough to drive! (Her previous car had looked like this, but I never got to drive it!)

Sunday, March 11, 2007

What's for dinner?

Tonight, the answer to that question is roast leg of lamb, baked sweet potato and sesame kale.

I remember eating lamb for the first time at my Grandmother Cleo's house. Most people I knew didn't eat lamb, and if they did, it was lamb chops, and they used mint jelly as a garnish. I have no objection to either lamb chops or mint jelly, but that's not how it was done at our house.


Cleo seasoned the leg of lamb with garlic cloves. Using a paring knife, she would poke small holes in the roast, and then slip a peeled garlic clove into the meat. When you sliced the meat, you often would get a sliver of garlic along with it.


On this picture I put little red arrows to show some of the garlic.


Cleo roasted her lamb in the oven, but we chose to smoke ours tonight. After larding with garlic cloves, and salting the roast, we put it in the smoker with some applewood.
We cooked the lamb for 3 hours, to an internal temperature of 145 degrees. It came out looking like this:


It was wonderful. The meat had that lovely red color around the edges you get when it is smoked well, and it was tender and delightful. We have enough leftover slices for sandwiches for 2 for 2 days, and chunks for 2 casserole and/or stir fry meals for 2 people/2 days.

We chose a white sweet potato instead of the usual orange. I thought the white ones were yams, and the orange ones were sweet potatoes, but I looked it up and found out the white sweet is a variety of the orange sweet. Cook's Thesaurus has the best page explaining the difference between sweet potatoes and yams.

The sesame kale was simply torn pieces of kale, with the stem removed, stir fried in about 2 Tablespoons of olive oil with 1 Tablespoon sesame oil added. I let the oil get hot, then threw the greens in. When they were sufficiently wilted, I added about 2 Tablespoons of roasted sesame seeds, and tossed everything together. All in all, a pretty tasty dinner, and fairly healthy. The lamb is not terribly fat, (and because I buy pastured lamb, it should be lower in fat) the oils in the kale are "good oils" and the sweet potatoes have a lower glycemic index than white potatoes.

I think my Grandmother Cleo would have been pleased.

Saturday, March 10, 2007

Happy Birthday! Old Fashioned Molasses Cookies


Well, today would have been my grandmother Helen's 105th birthday. The picture is labelled March 1981, so I think we must have gone to her house to celebrate her birthday- she is holding her first great-grandson.

This recipe is from her ledger- Helen made 2 kinds of cookies that I remember best, the hermits, and these molasses cookies. They arrived at our house in shoeboxes lined with foil, frequently with an apple slice in the box to keep the cookies moist. I adored them.
I haven't made them though, for several reasons. First, I hate making cookies, I'm just too lazy to enjoy fussing around with them. Also, Helen's recipe writing technique on this leaves out some steps, as you will see, and I don't bake enough to be able to troubleshoot well.

The main reason, though, is the first ingredient. The only things I ever made with lard were tamales. I don't want to substitute butter, because of the flavor change, and I swore off things like shortening. I see that Crisco has a no Trans Fat variety, and I guess I could overcome my purchasing prejudices enough to try it. Or maybe I'll just get some lard, after all, it's one batch of cookies, one time a year....

Old Fashion Molasses Cookies by Mrs Green (I have no idea who Mrs Green is)
1 cup lard
2 cups sugar
Cream these together
2 cups sorghum
4 eggs (Beat in light)
3 Tablespoons boiling water
1 Tablespoon soda
1 Teaspoon salt
2 Teaspoons ground ginger
2 Teaspoons ground cinnamon

Put creamed lard and sugar in large pan, then add soda and ginger.
Add soda, salt and cinnamon to flour.
Enough flour to drop or more flour, roll and cut.
I assume you add the egs and water to the sorghum MOLASSES, and then add that to the creamed lard and sugar, then add the flour mixture. I don't remember she ever made the drop cookies- the ones I was so fond of were rolled, and dusted with flour when you ate them. These are not a terribly sweet cookie. Let me know if you have a good substitute for the lard.
The pictures are my favorites of my grandmother's cookie jars. There was also a big glass jar that was always topped with a piece of aluminum foil.

Monday, March 5, 2007

What's for lunch? Ground Meat Sandwich.


As the unofficial Queen of The Land of Carbohydrates, I love sandwiches. To me, lunch just isn't right unless it's something between two pieces of bread. (Lunch can also be pizza, but isn't that just a big open-faced sandwich?) But my decision to eat local has made sandwiches a more difficult proposition than they used to be. My sandwich of choice usually involves some sort of deli sliced meat, a couple of kinds of tasty cheese, plus other stuff. I no longer choose to buy meat from the deli because I don't know how it was raised, leaving me a choice of cheese sandwiches, peanut butter sandwiches, fish sandwiches. They're all good, but I miss a meat sandwich.

While bemoaning the lack of sandwich making material, I remembered something I loved as a child; a sandwich ingredient my grandmother Helen used to make. She would take meat left over from a beef pot roast and put it through the food grinder, along with mayonaise and onion. She called this, aptly enough "ground meat". It made a darn good sandwich.

I decided to adapt her recipe, making some changes to reduce the fat content. I've used it for sandwiches, inside tortillas to make taquitos and quesedillas, and spread on top of pizza dough. It's very versatile, and very yummy. As a sandwich, I like it with pepper jack cheese, slices of onion and spinach instead of lettuce. Made in the food processor, it's more of a meat paste than ground meat.

Ground Meat

1 small (1-2 pounds) beef roast (could also use pork, chicken, lamb...)
3-4 onions, quartered
3-4 cloves garlic, if desired
water

Place everything in the crockpot, cook until very tender. If the meat is very fatty, refrigerate over night to solidify the fat to make it easy to remove.

Remove meat from bones, cut into chunks about the size of an apricot.

Place several chunks of meat in the food processor, along with some of the onion. Add a quarter cup or so of the pot roast juice, and process until the meat is a smooth paste. If needed, add just enough more juice to keep the food processor from binding up- it shouldn't be runny or drippy. Repeat with the rest of the roast. You can also add raw onion to the paste and process it, but I prefer to put a slice of onion on the sandwich. I pack the paste into the small rectangular Zip-Loc or Glad freezer containers and freeze all but one.

Thursday, March 1, 2007

Weekend Herb Blogging- Dill Pickles

In most large families, every month is someones birthday month. Ours was no exception- I think we only missed February, May and September. (Spouses and grandchildren soon took care of those months!) In my family, March was a triple threat- 2 grandmothers and one little sister. It seemed like a good idea to make this March all about the food my grandmothers made. And I thought I would kick it off with a recipe for Kalyn's Kitchen Weekend Herb Blogging


When my Grandmother Helen died in 1992, at the venerable age of 90, I was lucky enough to get her treadle Singer Sewing machine, her stove, her collection of cookie jars, and a ledger book with some of her recipes. Helen was a good plain cook- her fried chicken was to die for; so was her fried catfish and crappie. She made some yummy cookies called hermits that we haven't been able to duplicate. She gathered recipes from newspapers, women's magazines and friends, writing them down and personalizing them with notes. She was particularly fond of recipes whose names started out with a descriptive- the ledger book contains recipes for "Good Drop Cookies", "Very Good Sour Cream Cookies", "The Best Cream Pie Filling I have Ever Tasted", and this recipe "Very Special Dill Pickles".


I only remember Helen making these pickles a few times when I was a child. She used old fashioned half gallon canning jars with zinc lids, and I remember that the pickles looked so pretty in the jars, along with a whole dill flower head, the garlic cloves and peppercorns. The dill pickles became sort of a Holy Grail for my dad for a few years in the 70's. His mother had pretty much stopped making them by then, and he wanted to try his hand. I called my Dad this week to ask him about the pickles, and he said that they were always very hot and garlicky- he said almost too hot sometimes. These are fermented pickles; he remembered that the house always smelled strongly during the weeks they were "working". I told him I remembered going with him to the City Market in Kansas City, MO to buy cucumbers the years we tried to make them. We bought enormous cucumbers one year, and immersed them in clean new plastic garbage cans. He laughed and said that we hadn't been able to find small cucumbers that year. He said "I remember when I was a kid, some of those ladies who made pickles used cucumbers so big that only one would fit in a jar. That was kind of a problem."


My Dad asked me if I was going to be making pickles this summer, and I said I thought I might- but I am not using the jars with the zinc lids- I have one of them, but I only use it for keeping Helen's button collection!


I've written the recipe just as she has it in the ledger, parenthesis and all.


By the way- My father says to remember that it is very important that the cucumbers not be waxed or oiled- the brining won't penetrate the skins if they have been treated. And he says he can't wait to taste them if I make them, so I guess I am on the hook now. I figure they'll be ready in August- just in time to make a good birthday present for him!


Gramma Helen's Very Special Dill Pickles
Select size wanted, wash and brush good and let stand in well water over night. Next morn, wipe dry and place in qt. jars (or larger if wanted) in each qt jar (bottom) place a slice or 2 horseradish, dill, garlic button, med size red pepper, almost 1 teasp whole black pepper, Bay leaf or two if wanted (I never use them)


(2 1/2 cups pickling salt = 1 lb)


To six quarts water, add 1 lb pickling salt, 1 tsp alum. Bring to boiling point, add one quart pickling vinegar and pour over pickles. This amount will fill 9 or 10 quarts.


Use old fashioned rubber jar rings and zinc lids. Seal and then turn back one turn so they can work off. They look like they are spoiling, but in 6 or 7 wks they will be clear again. If the brine is not covering the pickles, add enough salt water to cover before sealing.


OK, now for my commentary- She doesn't specify how many cucumbers to buy, and I guess that depends on the size. When I make them next summer, I will use what the local farm stands call aptly enough "pickles"- cukes about 4 inches long but fairly thick. I'll probably take my quart jar with me and figure out how many cukes will fit. When soaking the cucumbers over night, make sure they are submerged- you may have to cover them with a weighted plate or something. I don't know why they are supposed to soak in well water, and neither did my dad. It could be that the well water in Central Missouri was high in lime, and this would make a crisp pickle. If you don't have lime-y well water on hand, you can use pickling lime. Be sure and follow directions carefully- failing to rinse the lime out of the pickles can lead to reducing the acidity of the vinegar, which could lead to botulism.


Since I will not be using the old zinc lid jars, I will set the lid part of a 2 piece modern canning jar lid on top, and screw the jar ring on very lightly, so when the pickles are working it is possible for them to "spew" a little. I will set them in something that will catch anything that oozes out of the jar. And my dad suggested that they be kept someplace where the temperature is constant.


If you have never canned before, please consult an expert- I suggest the University of Missouri Extension Center, or the University Extension Center of your choice. Quarts of pickles can be processed for 15 minutes in a water bath canner. Also, be sure your vinegar isn't too old; it loses acidity over time.